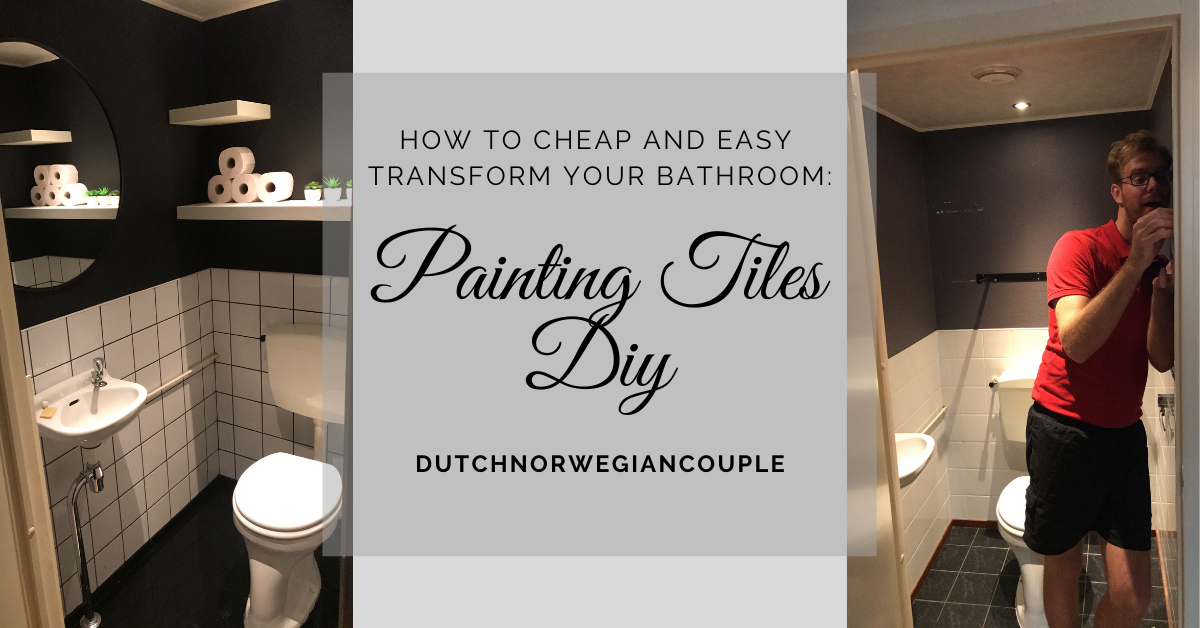
Painting tiles, is something that some people believe will work. And some people totally don’t believe. We’re here to tell you that it works. And we’ll show you how to do it! We’ve done it before and we’ll do it again. You can transform your whole bathroom in a cheap and easy way. Sounds tempting? If you’re okay with the fact that the paint won’t last forever. And therefore, might have to be re-done after some time. Then we totally recommend you to try this out. Painting your tiles will give you a major upgrade from the not-so-pretty tiles you have today. We did both floor tiles and the wall grout in the house in the Netherlands. And we’re SO happy with the result! Continue reading to see how simple it can be done!
- Step 1 Sand down and clean the tiles
- Step 2 Repair the tiles/grout if needed
- Step 3 Use a really good primer
- Step 4 Paint the tiles and use sealer
- Step 5 Let it dry (long) and voilá you’ve transformed your bathroom!
Step 1 Sand down and clean the tiles
By sanding down the tiles, you’ll make sure the primer sticks better to the tiles and that’ll give you a longer lasting result. Since painting tiles won’t last forever, this is a very good step to follow to make sure it lasts as long as possible. Buy your sandpaper here. We must be honest and say that we skipped this step with the first tiles we painted in the Netherlands. Now that was a very small guest toilet, that wouldn’t be used as much as your own bathroom. But anyway, we should’ve know better. Now we do. You can sand down the tiles by hand or use an electric sander which makes the job much quicker.
The second good thing about sanding the tiles down is that you’ll be able to remove dirt and crap that you’ll not be able to remove when cleaning. Which is the next step: clean the tiles. Like, REALLY good! First you should vacuum up all the dust from sanding down the tiles down and then you can start to clean them. You should use a heavy duty cleaner or something similar. This one for instance. Follow the instructions and make sure you really scrub the tiles. Let it sit for a while before you clean it off. Your paint will stick better the cleaner your tiles are, so make sure you clean them good!
Step 2 Repair the tiles/grout if needed
Before you continue you should check your tiles for cracks or damage and if the grout is in good shape. If not, you should repair it before you go on to the next step. You can either re-grout what is missing and replace broken tiles – but this can be quite a big job. Or you can use clever tricks to fix it in a way that after they are painted you wont know the difference. One option is to use caulk. But make sure you buy the type that can be painted over! Caulk can be used on cracked tiles as well. Smooth it over and let it dry.

Step 3 Use a really good primer
If you want your paint to stick, and last- a good primer is the key! Check out primers here. Use a brush to paint the grout and a roller over the tiles. If you’re painting floor tiles – remember to end by the door so that you can get out. Two layers of primer makes it even better, but make sure it dries long enough before you do the second layer.

Step 4 Paint the tiles (and seal?)
Paint the tiles using a brush on the grout and a roller on the tiles, do this in the same operation. Follow your paints instructions for drying and do 2-3 layers. Buy your paint here. If you choose to seal your tiles do that after your last layer of paint. The only thing worth to mention is that if you choose to seal your tiles, it’ll be more complicated if you need to repair your painted tiles later on.
Step 5 Let it dry (long) and voilá you have transformed your bathroom!
Make sure the floor tiles dries for at least 2 days before you start walking on them. It’ll take 1-2 weeks before the paint is completely dry all the way through, so be careful with it.
You’re done! Easy right?!
We were so happy with the finished result with our painted floor and painted grout. Once we’d bought a new mirror (Check out this similar round mirror here), and finished decorating, it locked awesome! For our next painting-tiles-project we really want to use stencils to get an on-trend pattern! We’ve already bought the stencil and can’t wait to get started. We’ll of course share the finished result with you!
So what do you think about painting tiles now? We hope you like it and see that you totally can do this yourself!


