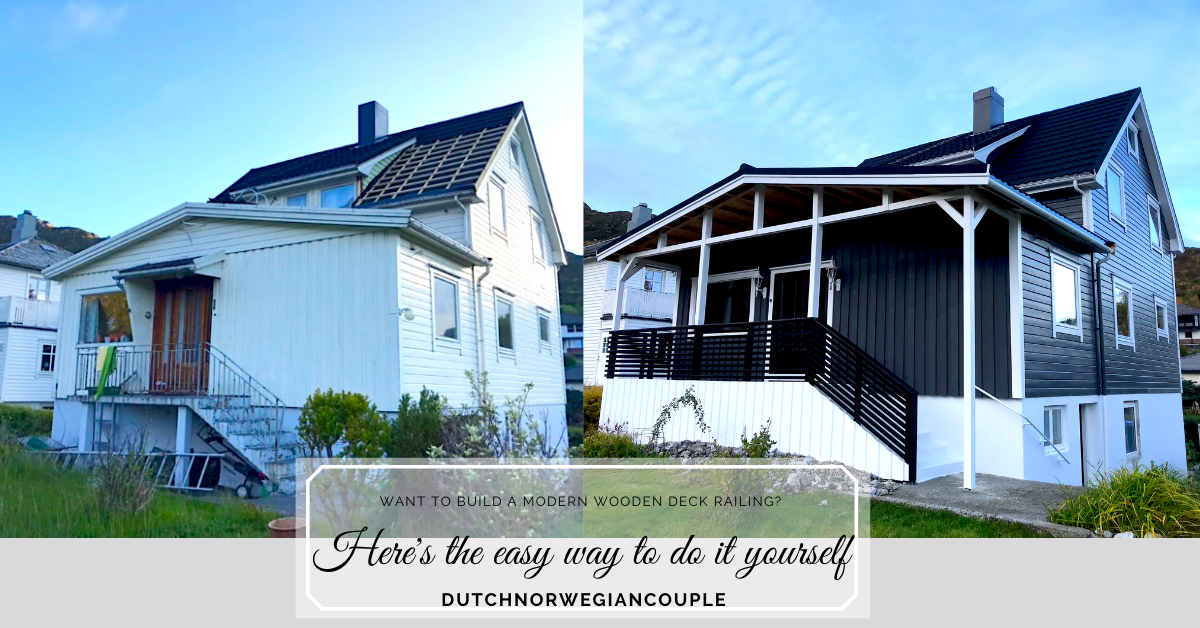
Building a deck railing is super fast! Here we’ll show you how you can do it yourself. We build a quite modern type of deck railing. And used horizontal lines instead of the traditional deck railings with vertical lines.
Prepare
Before you start, you need to prepare. And depending on what you start out with, what needs to be done will differ. We’d already pulled out the roof for our outside porch, as you can see. And the support used for the roof, would also be used as support for our deck railing. If you’re building a deck railing around an existing porch or terrace, you might be able to reuse your old support too. Anyhow, if you’re doing it that way, the first thing you need to do is to tear down the old railing and prepare for the new one to come. If you’re building a railing on a newly build terrace, you might have to build support as well. Depending on how well though through you’ve been from the beginning.
Materials & tools needed
Materials:
Since we’ll focus on the deck railing here, all you really need to make this deck railing is;
- 4,8 cm x 3,6 cm (2in x 1,5in) for the horizontal balks
- 9,8 cm x 9,8 cm (4 in x 4in) beams for the vertical support
- 9,8 cm x 4,8 cm (4in x 2in) beams for the lower vertical supports
- 14,8 cm x 1,9 cm (6in x 1in) for the top plank
- Standard brackets
- Primer
- Paint
Tools:
- Drill
- Screws
- Hammer
- Nails
- Circular Saw
- Hand Saw
- Tape Measure
- Level
- Clamps
- Gloves
- Glasses
- Hearing Protection
- Roller
- Paintbrush

Make foundations
Since we’d already build the support, we’d already done this step before we started on the deck railing. But, we’ll explain you how to do it if you start from scratch. Your support will hold the weight of the deck railing, but also make sure it is safe. Therefor it needs to have foundations made of concrete. You can buy these standard brackets which a 9,8cm x9,8 cm (4 in x 4in) beam will fit right into. All you need to do is to drill a whole in your existing concrete. Then fill it up again with new concrete. Immediately after you’ve pored the concrete in, you’ll need to place the bracket into it – AND make sure it’s level. It’ll dry really fast, so make sure you’ve prepared everything beforehand. If you’re building a deck railing on a gras terrace for instance, then you’ll have to do this a little different. Then you’ll have to dig a hole big enough that if you fill it with concrete and place a bracket into it, it’ll be stable and level.

How to build
Are you ready to start building your railing? The first thing you need to do is to decide what hight you’ll want to have your railing. There are rules that need to be followed. In Norway, railings like this must be minimum 1 meter. Then you need to determine what distance you want to have between your horizontal balks. The easiest way to do this is to use the same distance as the width of your balk. That way you can use a small piece of the balk to determine the distance between each new balk. But, double check how many planks that’ll give you. And if you’re happy with the distance that’ll give you at the lower part. Since we used 4,8 cm (2in) horizontal balks, that gave us 10 balks.
Start by measuring and make your vertical support beams the correct length. Once you have 3 support beams in place, you have 3 places where you can attach the horizontal balks. Then you can start at the top with your horizontal balks. And place one by one until all 10 are in place. Continue on your next part of the railing, and do it the same way until all parts of your railing are done. If you have inclined parts of the railing like we have here on the wright side, that’ll be the most tricky part to get correct. But, be patient, and think before you act – and you’ll be fine!

Paint
Woohooo! You are finished building your railing! Easy right?? You can now begin on the most fun part, in my eyes. Painting! We did 1 layer of primer (white), and after that 2 layers of a matte black paint. In total you need to paint 3 layers in between all of these balks. We must honestly say that painting took more time than what we expected. But, the finished result was all worth it!

Our before & after
We thought we’d show you guys how the entrance to our house looked before and after. Of course, we’ve done much more work than only the wooden railings. As you can see. But, this is our finished result! Do you like it? Do you think you can make a wooden railing yourself now? We totally believe in you! If you have any questions, don’t be shy! Send us an email and we’ll answer you within 24 hours. Thanks for reading, and until next time!


