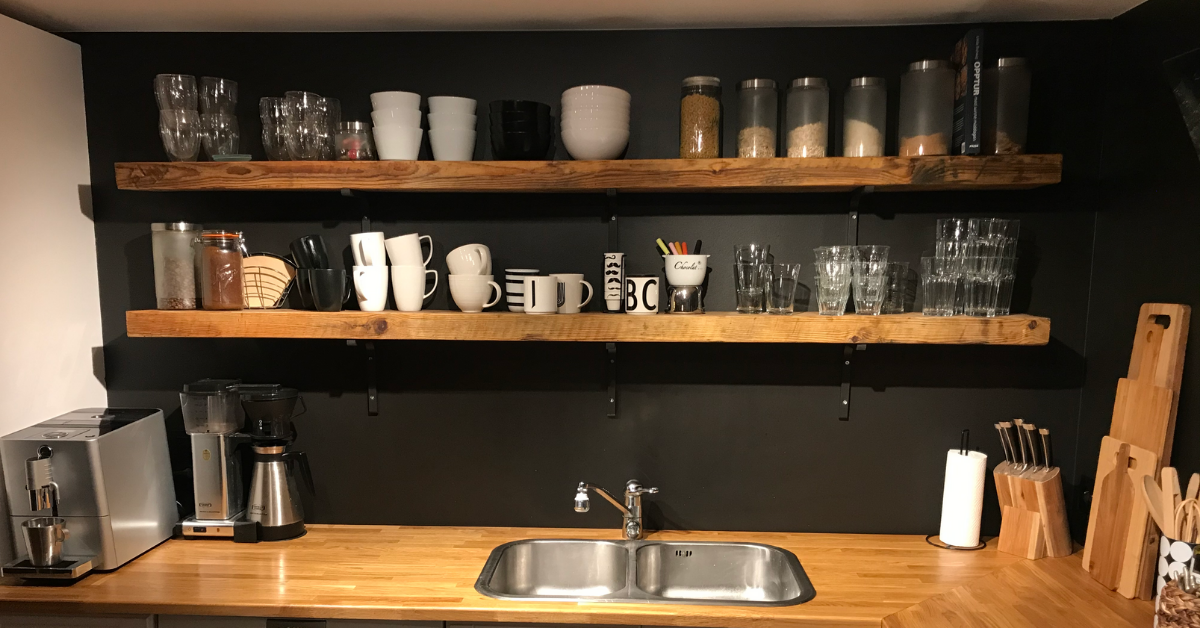
Ever wanted to have those old rustic looking shelves in your kitchen or anywhere else in your house? Then you’ve come to the right place! Here we’ll show you how we did it and give you a step-by-step guide so that you can do it yourself! We used two planks above each other. But you can choose if you want to use 1,2 or 3 planks above each other. It’s really simple actually. Just follow these steps and you’ll have it done in no time.
- Planks
- Buy brackets
- Cut them & Sand them down
- Use oil to protect & give them the right colour
- Hang & Style them
Planks
Find old ones
The best, easiest and cheapest way to do this is of course if you have some old planks that you can use. Do you have an old house like we do? Then I guess there’s a big chance that you have some planks laying around the house. We found these planks in the very beginning when we bought the house. We first used them as support when we removed a wall in the basement. And after that we’ve kept them dry in the garage. I found them beautiful from the start, and always new they only needed some love, and their true beauty would shine through!
Buy new and make them look old
If you don’t have an old house. And cannot get a hold of old planks, it’s possible to use new ones. All you have to do is buy yourself some planks the right width. Use some tools to scratch, hammer and damage the planks. This way you’ll get the right old look you want. Your imagination is the only stopper to what you can do to make them look old. When that’s done, use some dirt or used coffee powder to make them look more used. And to give them a darker colour.
Buy brackets
There are many different types of brackets and support that you can use. Do you love steel? Or wood? Choose whatever you like the best. Just make sure that what you choose, is strong enough to hold up the weight. We went for wood, and found some cheap ones for only 6 $ per piece. Then we painted them black. We used the same colour as the wall were we wanted to hang the shelves. That way, they blended nice and easy into wall. For us, two layers of paint was enough. But this you’ll have to see for yourself. You can of course also make your own brackets from wood or steel, but we went for the easy way.

Cut them & Sand them down
As said, we found our planks in our house. We had already cut them at the same length, (210 cm/ 6-7 feet) because we used them in the basement as support when removing a wall. Luckily this length was perfect for the space where we wanted to put them. So we could go right ahead sanding them down. I guess you would have to cut your planks? Just measure the total length of the wall where you want to have them. And measure out what length you want your planks to be. Make sure that you have an equal open space on both sides. Once that’s done, you can go ahead and sand down the planks. We used a quite coarse sandpaper, Grid60, to sand down our planks. They had old paint spots on them. And needed quite some work before we got the result that we wanted. But after a few rounds your planks should start to look good.

Use oil to protect & give them the right colour
After sanding them down, you should clean them up. After that you’re ready to oil them in. You can choose yourself what type of oil you want to use. The oil will protect the wood from substances, like food and spills. And it’ll colour your planks darker. We oiled the planks two times, and got the perfect colour just like we wanted. We used something as simple as Olive oil for only 5$ per bottle – and that worked out perfect.
Hang & Style them
Then you’re ready to hang your planks on the wall. Make sure you attach them to good enough materials, so that they will be able to support weight. We have built this hole floor from scratch ourselves, so we knew that we had a 60-60 frame of wood behind the dry wall. We just measured out where the frames should be, and found three places where we could attach the planks to the wall. Now they will hang forever. You can also use a stud finder to find out where you have wood behind your dry wall.
And volá- you’re done! Now just style the planks as you’d like. Use them as storage for your plates or decorations. For books or for pictures – it’s up to you!
We hope this guide comes in handy. Will you share your result with us? We’d love to see it.
Tip: Take a look at the countertop from Byggmax that we’ve installed here. We’re SO happy with it.
Please share this post so we can help other diy-ers too!


